Monday, September 17, 2012

Ginger-Citrus Pork Shoulder

This little piggy is slow cooked in the crock pot.


The nights have been cooling off reminding us that we have entered the autumn months. In The RQ's kitchen that means lots of root vegetables, slow cooked stews, and meat. This season pork shoulder took the lead. After soaking overnight in a sherry vinegar/orange juice seasoned (coriander) marinade, 4 1/2 lbs of flesh slow cooked for 12 hours. Only 15 minutes of browning stovetop before setting off to work and everyone returns home with tender meat to be paired with mashed potatoes and a side of your favorite cooked green.

Friday, September 14, 2012

Dinner in "a snap" - Lentils, Couscous, & Fresh Veggies

Two medium pots of water. Measure half a cup of lentils to thick bottomed pot, add plenty of water to cover, a bay leaf, and bring to a boil; cover & simmer 20 minutes. In a second pot, boil 1-1/2 cups water, chicken broth, or vegetable broth, add 2-3/4 cup Couscous. Stir, remove from heat, and let stand uncovered 15 minutes, and fluff.


Drain water from lentils once cooked; remove bay leaf. Add roasted plum tomatoes prepared earlier in the week, fresh basil or mint. Saute garden fresh swiss chard in butter/olive oil, red pepper flakes, and salt to taste.


Mix chopped garlic & scant amount of sea salt into plain greek yogurt. Layer and serve it on one plate!


Shopping List
Couscous
Green Lentils
Broth (chicken/vegetable)
Swiss Chard
Fresh Basil
Plain Greek Yogurt
Bay Leaf

*roasted plum tomatoes

Slight variation from my favorite Irish cook, Rachel Allen!

Saturday, September 8, 2012

Thai Red Curry


Lovers of food and time spent with family P< couldn't resist taking a stab at one of our favorite dishes everyone orders at our local Thai Restaurant, THE KING AND I. Our extended family has been enjoying the delicious flavors of Thailand cuisine for decades! With all of the wonderful vegetables from our local farmers and the essential Thai seasonings that we keep on hand, P< whipped up Evil Jungle Prince, a hot, spicy, coconut sauce with fresh herbs, green beans, and bamboo shoots. You can add chicken, shrimp, fresh/fried tofu, or keep it simple and just add your favorite vegetables. The experience is all in the sauce!

Thai Red Curry Sauce

vegetable oil
1 shallot
1 clove garlic
1 Tblsp red curry paste
1 cup unsweetened coconut milk
1 cup chiclken/vegetable broth
2 Tblsp fish sauce
2 Tblsp sugar
1 dried hot bird pepper, crushed (Tien-Tsin, red pepper from China, I use Penzeys)
pinch of ground turmeric

Sunday, September 2, 2012

Frozen Cocktail for a HOT Summer Night


Cream Puff, The Red Queen, & Port-less thoroughly enjoyed bringing in September with this inspiriting drink! Be sure to include something to munch on because this liquid will vanish right under your nose! Thanks Ladies!

Friday, August 31, 2012

Roasted Garden Plum Tomatoes


Enough olive oil for a healthy coating, freshly chopped garlic, red pepper flakes, salt, & black pepper slowly roasted in a jelly roll pan for six, yes SIX hours, at 250 degrees maintains the juicy factor of these tomatoes. Some recipes roast at a higher temperature for shorter periods which results in a dryer tomato. The longer roast yields RICH garden roasted tomatoes!


Note: Variation...add a bit of anchovy...and ENJOY!


Thursday, August 23, 2012

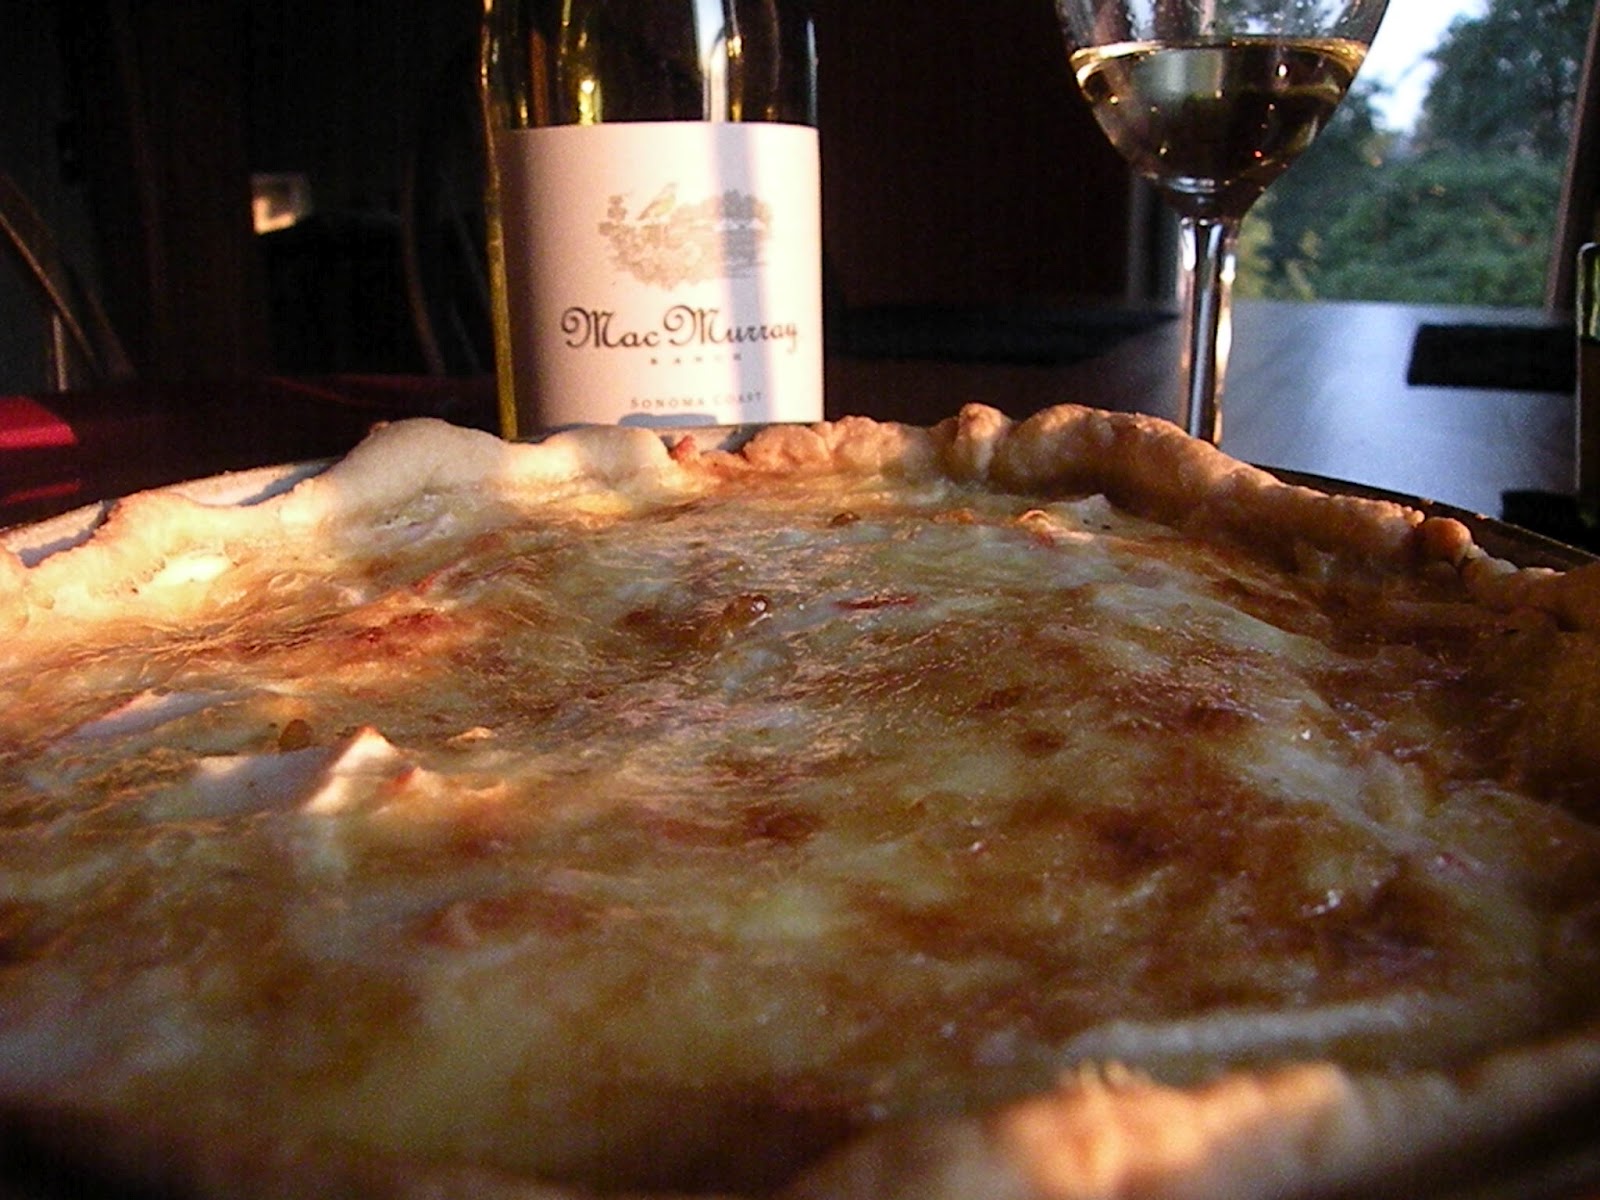
Dinner in "a snap" - Crab Quiche

The RQ loves quick and easy meals that take advantage of leftovers. So not only is this dinner ready in "a snap," it also made use of extra "crabmeat" not needed in an alfredo sauce prepared earlier in the week.  I've been using this quiche recipe from Craig Claiborne for over twenty years. You can doctor it any way your creativity takes you, such as pesto and Italian cheese quiche or traditional Quiche Lorraine. Enjoy!

The crust for the pie comes together quickly while the oven heats to 450 degrees. Be sure to weight this crust down while crisping! Anything that needs to be sauteed or whipped up is done easily while the crust is in the oven. This includes the quiche filling! The sauteed veggies are added first to the awaiting crust, then the crabmeat and cheese, and finally the milk & egg mixture. Pop back in the oven at 450 for 15 min then reduce the oven to 350 for about 10 till center is set. The quiche can be served immediately or allowed to cool.

Crab Quiche
(8" quiche dish)

crust-
1 1/4 cup flour
1/3 cup butter
1/4 cup water, COLD

filling-
scallions or shallot chopped and sauteed
4 oz imitation crabmeat, flaked (half a package), chop/slice further if desired for smaller chunks
1/4 cup finely grated parmesan or other sharp dry Italian cheese
1 cup grated cheddar cheese (any preferred soft cheese, i.e. swiss, smoked gouda)
3 eggs
1 1/2 cups half n half (3/4 milk, 3/4 half n half is fine)
salt & pepper


Thursday, August 16, 2012

RAW Food & Leftovers for Lunch


Just another summer day enjoying the fine fruits of our local farmers. Today CC and The RQ began by layering a beautiful mauve round eggplant and yellow sweet pepper leftover from last night's steamed veggies. The RQ then whipped up a quick tapenade (kalamata olives, capers, artichoke hearts, garlic, parsley, olive oil & lemon juice) to add some rich flavors. A healthy spread of room temperature goat cheese layered with the eggplant slices added an extra nice touch for cheese lovers!

Saturday, July 28, 2012

Flour's Sticky Buns


I have really enjoyed being home these past few weeks. I have been baking and cooking up a storm. To accompany these activities I have also enrolled in Denton Bootcamp to help even out all of this eating. So yesterday, I was on a bike ride with DD, and we were deciding what we wanted for breakfast today. She decided that she wanted sticky buns. We made the brioche last night and we got up around 7:30am and finished the buns. We made the warm goo and rolled them up with sugar and pecan goodness. Currently they are in the oven baking. I have made these once before and they were delicious! I am waiting for them to come out so I can grab a picture and put this post up! The recipe is from Flour Bakery + Cafe in Boston. I have been to the Flour Bakery at their South End location but unfortunately they were already sold out of the sticky buns before I got there. So I've never had one of theirs to compare. If you find yourself in Boston check out one of their three locations or try the recipe here. Enjoy!

Thursday, July 26, 2012

Blueberry Cheesecake


A few nights ago for dessert we enjoyed a delicious blueberry cheesecake! This is my all time favorite cheesecake recipe because it has about half the amount of cream cheese as the other recipes. I also like this one because you can make a variety of different fruit toppings. Last week we made a blackberry, raspberry combination for the top, and tonight I decided to try blueberries. It is all depends upon what you have on hand or prefer.

Blueberry Cheesecake

Crust
12 oz Vanilla Wafers
1/2 cup pecans or walnuts
1/2 cup melted butter
1 1/2 t vanilla

Filling
24 oz cream cheese (3 packages)
1 1/2 cup sugar
4 eggs
1/2 cup sour cream

Topping
2 cups blueberries
1/2 cup sugar
2 T water
1 T cornstarch

Preheat oven to 350F.

Place vanilla wafers and nuts in a food processor. Pulse until crumbs form. Add melted butter and vanilla until combined. Pout into 10-inch springform pan and press crumbs into the bottom. The crumbs should come up the sides of the pan.

In a stand mixer, combine the cream cheese and the sugar until smooth. Add eggs one at a time. Add sour cream and mix again. Whip until no lumps are visible. Pour mixture into the crust and bake for 1 hour. Turn off oven and allow cheesecake to sit in the oven for an additional 30 minutes with the door open.

For the topping. Add the berries, sugar and water into a saucepan. Bring to a boil. Then mix cornstarch and a small amount of water until dissolved. Add this to the mixture and bring to a boil for at least a minute. Turn off the heat and allow to cool. Pour over cheesecake and place the pan in the fridge to set for at least 2 hours before serving.

Recipe adapted from The Pioneer Woman

Tuesday, July 24, 2012

Blueberry Peach Crumb Pie


The farmers markets have been filled with delicious peaches and blueberries this summer! I have enjoyed eating and baking with both of them! I did a variation on the blueberry crumb pie and added peaches and used dark brown sugar instead of light brown sugar for the crumb topping. The picture above is before I put the crumb topping on. Delicious! I think next time I might experiment and add some rum to the peach mixture! I've been reading a lot of recipes with that combination and I think it might add some jazz to this pie! I can't wait!

Saturday, July 21, 2012

Chocolate Fallen Cake


In celebration of a close friends new job opportunity I decided to make a cake to share with her over a bottle of my favorite moscato, Santero Moscato d'Asti. It is very sweet and bubbly, perfect for desserts! This recipe for chocolate fallen cake is very easy to make, doesn't require a lot of ingredients and can be served with vanilla ice cream. I would recommend making this as a quick dessert that would please any chocolate lover! The texture is meant to be oozing out of the center when the cake is cut. If this does not happen then the cake is too dry for this recipe. Enjoy!

Chocolate Fallen Cake

8 T unsalted butter
8 ounces semisweet chocolate
4 eggs
1 egg yolk
1 t vanilla
1/4 t salt
1/2 cup sugar
2 T flour

Preheat oven to 375F. Generously butter and dust an eight inch springform pan with cocoa powder. 
Melt butter and semisweet chocolate together in the microwave or a double boiler. Once smooth, 
remove from heat. 

In a stand mixer, combine eggs, yolk, sugar, salt, vanilla. Beat on the highest speed until thick and pale and the volume has tripled. The mixture is done when it falls away from attachment in a smooth stream. Scape the egg mixture over the melted chocolate and fold to combine. 

Pour into your pan and bake for 27-30 minutes. The cake will look puffed with a thin top crust. Carefully remove from oven and run a knife around the outside of the cake to separate it from the pan. Cool cake for 15 minutes before serving.

Thursday, July 19, 2012

Blueberry Crumb Pie

I would like to sincerely apologize for my lack of presence on Together Cooking recently. After returning from Colorado I was extremely busy with moving back to school and returning to the the life of being a student. My basic day is breakfast, work, lunch, class, class, class, dinner, class, work out, homework, sleep. I promise that now that I am back to my regular routine I will be back blogging and sharing my culinary adventures with my friends and readers. I am planning on putting up some Colorado leftover posts and some new posts as well. To start this off I would like to share with you a recipe for Blueberry Crumble Pie. I decided to make this after dinner one night for dessert. If you would like to make this pie I would recommend making it ahead of serving it so that it cools to room temperature which allows the pie to set up. Otherwise you will have a liquidy mess of blueberry all over your plate. Enjoy!

Blueberry Crumble Pie

Pie Dough:
1 1/4 cup flour
1/3 cup butter
5 T cold water
dash salt

Cut the butter into chunks and combine with the flour and salt. Add cold water until the dough forms a ball. Roll out and place in pie dish. Place the rolled out dough in the freezer for 20 minutes before adding the filling and the crumb topping.

Filling:
4 cups blueberries
1 T lemon juice
3/4 cups sugar
3 T cornstarch
1/2 t lemon zest
1/4 t salt

Place the blueberries in a large bowl with lemon juice. In a separate bowl combine sugar, cornstarch, lemon zest and salt. Add to berries mixture and stir. Set aside.

Crumb Topping:
1/2 t cinnamon
1/2 cup brown sugar
1/2 cup flour
1/2 cup oats
1/4 cup butter, melted

Combine the dry ingredients then stir in melted butter. Remove crust from freezer. Add blueberries. Add crumb mixture. Place in 375F oven for 45 minutes. Until the berries start to bubble. Remove and let sit until room temperature before serving. Enjoy!

Monday, June 25, 2012

Almond Milk

~Dedicated to Mollie and her brood!


The RQ began making almond milk when CP, CC, & LB were very young. Now they are older, and so are the RQ and P<. Making almond milk from scratch is a treat we ALL enjoy and it promotes good health. It is easy to prepare and can be tweaked to preference. We like to add a tablespoon or two of local maple syrup and a teaspoon of vanilla.

Almond Milk
1 cup almonds
4 cups water
1-2 Tblsp maple syrup
1 tsp vanilla

To remove almond skins
Place almonds in a heat tolerant glass/ceramic bowl.  Bring enough water to boil to cover an inch above almonds. Poor boiling water over almonds and allow to soak till cool enough to handle. Drain, rinse, and peel, using your fingertips skins pop easily off nuts. Rinse skinned nuts.


To make milk
Measure 4 cups of cold water. Place almonds in blender adding enough water to create a smooth paste that blends easily (about 1 cup of water). After about a minute or two slowly add the remaining water to the paste. I do this in two batches as my blender will not hold the full 4 cups of liquid plus almond meat. Thus, poor the first batch thru a fine mesh strainer sitting over a pot/bowl large enough to hold liquid and without strainer sitting in liquid. Use a rubber spatula press & fold any remaining water from meat of nuts. The more you press, the meatier your milk will be, or as P< says, grainy. The milk can be strained a second time if a less grainy liquid is desired. Add maple syrup and vanilla to awaiting carafe. Poor in a bit of milk and swirl to mix. Then add remaining milk, and stir. Refrigerate and enjoy!

To make banana shake
Freeze a banana (peel & wrap in plastic). Mix frozen banana with 8-10 oz of almond milk for a delicious shake!

Aside
The almond meat can be refrigerated and used as a nice body scrub in the shower! OR Dehydrated on low for 2-3 hours for a nice almond meal to be added to baked goods!


Wednesday, June 13, 2012

Dinner in "a snap" - Grilled Chicken Salad

~Dedicated to our LOCAL FARMERS
Dinner in "a snap," code for 30-minute meal, easy as pie, duck soup, or effortless! When you want a quick easy meal any night of the week simply search for Dinner in "a snap!"

In western New York our local Farmer's Market opened last week. The connection to local farmers and produce is a magnificent way for the RQ to revive her relationship to the source of the food, the earth, as well as to the farmers who grow the crops and the family and friends for whom she is preparing the food. Our local farmer's market is open from June thru October. Available are fresh produce, all natural meets, granola, organic pasta, and much more. But the ultimate jewel is bringing home fresh local vegetables and fruits from the market. The unfolding of tonight's meal started with a vibrant head of Romaine from one farmer and a bunch of asparagus from another. It's too early for home grown tomatoes in New York so tonight the RQ used flavorful Campari tomatoes, greenhouse vine ripened and herbicide free. While the oven heats to broil for the asparagus, salad preparations begin. For blue cheese lovers the RQ tosses the lettuce with a scant amount of blue cheese dressing and then gives the pepper grinder a few turns. The tomatoes are cut in half and tossed in a simple balsamic vinaigrette (below). The asparagus as featured in the Roasted Asparagus with Lentils post is simply tossed with a bit of veggie oil, salt & pepper and broiled in the oven for a few minutes. Chicken breasts are grilled stovetop in a few tablespoons of oil in a HOT iron skillet for about six minutes each side; a quick and tasty compliment to the salad makes this a meal. Dress it all with any remaining vinaigrette from the tomatoes and blue cheese crumble. To satisfy our appetite for something sweet to follow, we simply munched on fresh local strawberries.

Shopping List-
Chicken Breasts
Asparagus
Romaine Lettuce
Tomatoes
Blue Cheese Crumble
Blue Cheese Dressing
Olive Oil
Balsamic Vinegar
Salt & Pepper to taste

Balsamic Vinaigrette- 3:1 Extra Virgin Olive Oil: Balsamic Vinegar, salt & pepper to taste

Friday, June 1, 2012

Homemade Italian Pimientos

Just have to share this simple roasted red pepper recipe from The RQ's Italian grandmother. These have been a staple since Gram first shared how easy they are to prepare. Italian seasoned pimientos are great as a side to many a meal. Roasted pimientos are also great chopped up and/or added to many a salad, sandwich, veggie or baked casserole. Pimientos can include the basic red bell pepper, cherry pepper, & of course, the chili pepper.

Pimientos
3-4 red peppers (bell, cherry. chili)
2-3 cloves garlic, chopped fine
13/4 tsp dried oregano
salt & pepper
olive oil just to almost cover

Bake (500 degrees) or broil, or char peppers over a gas burner (personal preference). I prefer baking or broiling as it is the least messy. Place foil on bottom of oven or lower rack if want to avoid leaking juices while the skins blacken. Don't forget to turn peppers to blacken all sides, about every 10-15 min.. Once blackened place in glass bowl and place lid on top to allow the skins to peel away from flesh. Once cool. Peel and slice. Add to oil & spices, refrigerate...ENJOY!